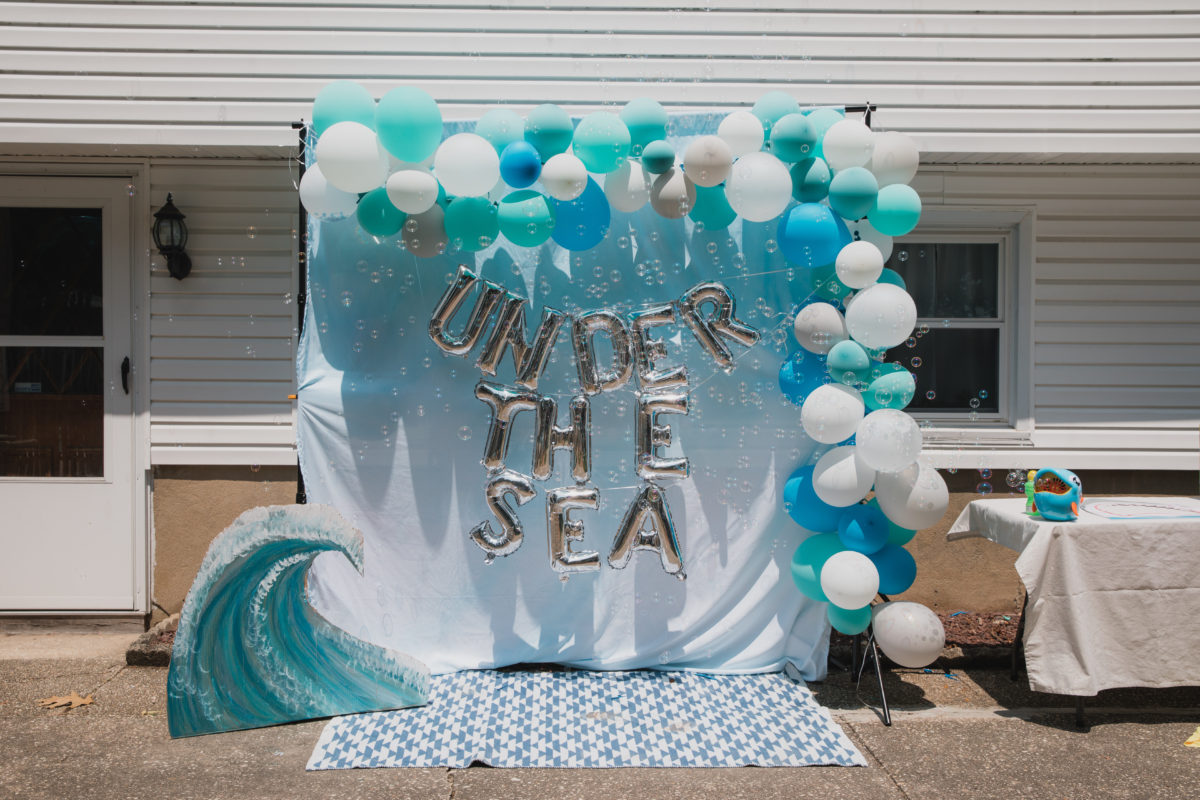
Making your own balloon arch is easier than you think. I recently made one for my son’s under the sea theme first birthday and now I am looking for reasons to make balloon arches. Haha!
Here’s how I made the balloon arch and the tools I used to do so.
What you’ll need
- Balloons (4 – 7 different colored balloons)
- Hand pump or electric pump
- Arch Strip
- Glue Dots
- Ribbon or string
- Large trash bags (If you plan to blow up the balloons the day or night before your event)
I purchased this balloon arch kit and it is enough for multiple uses.
Step 1: Decide on location and length
You’ll want to figure out the length of your balloon arch as well as where you’d like to put it. I hung our balloon arch on a photo booth backdrop support system but some other options are:
- A wall
- A door or archway
- Above a large window
- A fence
- A tent
Step 2: Blow up the balloons
I would suggest blowing up your balloons the day or night before your event. It helps to save a lot of time the day of! You’ll want to blow up your balloons in many different sizes. Store the blown up balloons in large tightly sealed trash bags. This will help them to not oxidize overnight.
Step 3: Add balloons to the arch strip
Simply take the knotted end of the balloon and start adding that end through the holes on the arch strip. I suggest starting it on the second or third hole. This allows you to use the first holes for hanging the arch later on. Continue to add them until you reach the desired length of your arch. Be sure to mix up the sizes and colors throughout your arch. I even added some DIY confetti balloons. (You can read my blog post on how to make them here). I preferred to not have a pattern and just to sporadically add them to the strip.
Step 4: Hang it up!
I decided to hang our arch on a photo booth backdrop support system. I used ribbon to secure each corner, the middle and the bottom of the arch. If you are hanging it on a wall you can use the glue dots that come with the balloon arch kit.